
How to Set Up A Proxy in GeeLark
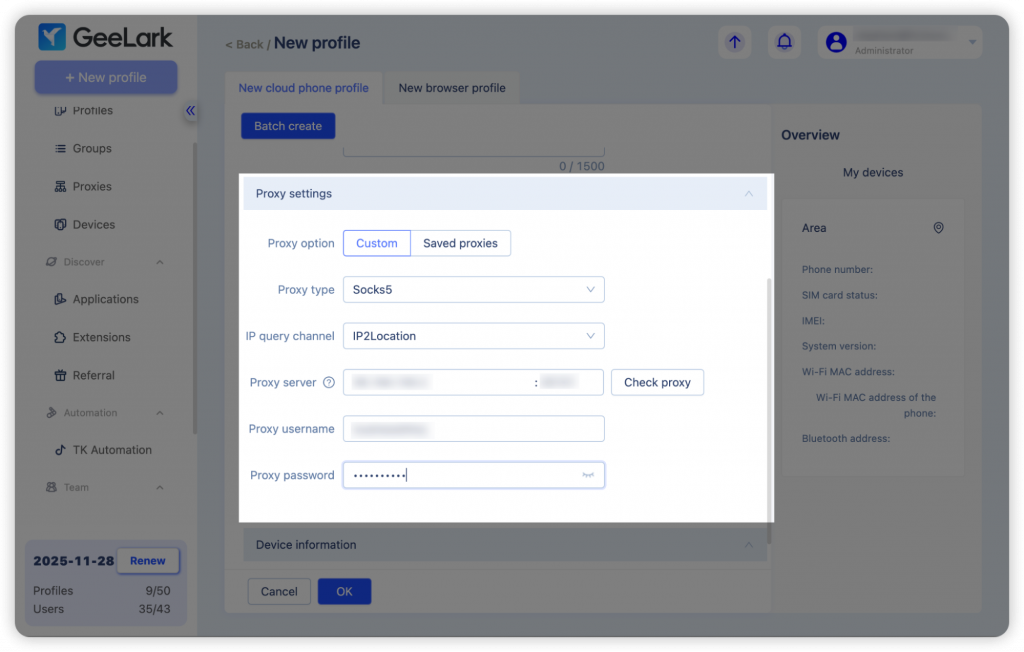
Set up a proxy in a profile
- A proxy is necessary for creating a profile. You can set up a proxy by filling out the required information, such as proxy type, port, host, username, and password.
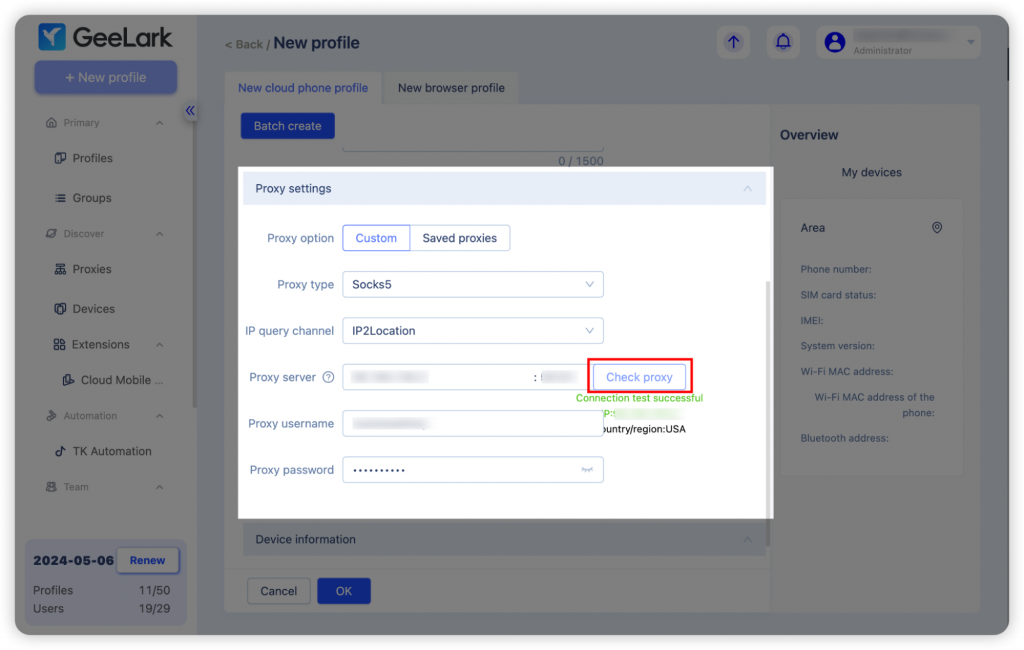
- After filling out the information, click “Check proxy” to test the proxy connection. GeeLark has integrated with two IP address databases: IP2Location and ip-api. You can choose one of them to verify the IP location.
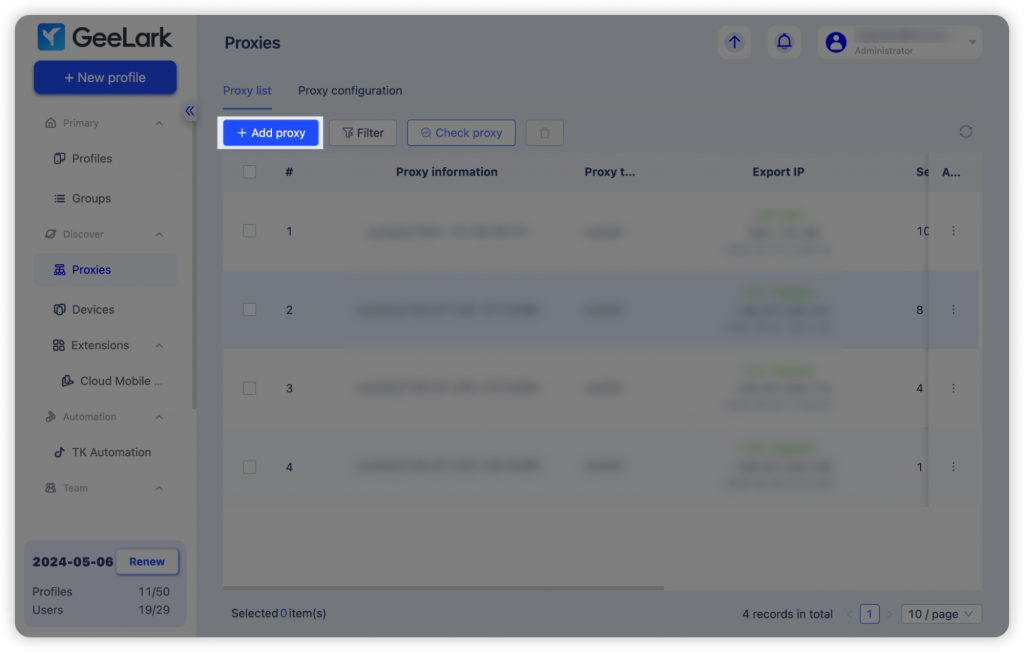
Add proxies to the Proxies section
- Instead of individually setting up a proxy for each profile, a more efficient method is to use the “Proxies” section for bulk management.
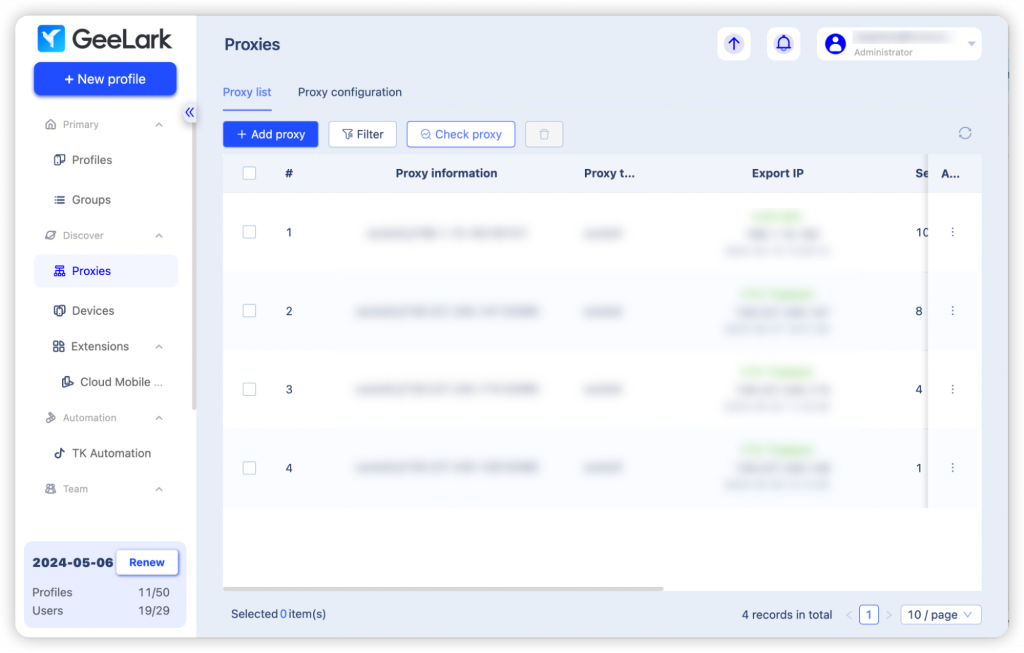
- Begin by selecting “Add proxy” to add multiple proxies simultaneously.
- Enter the information for your desired proxies in the specified formats, ensuring each proxy is listed on a new line. An automatic check for duplicates will be performed, preventing the addition of any repeated proxies.
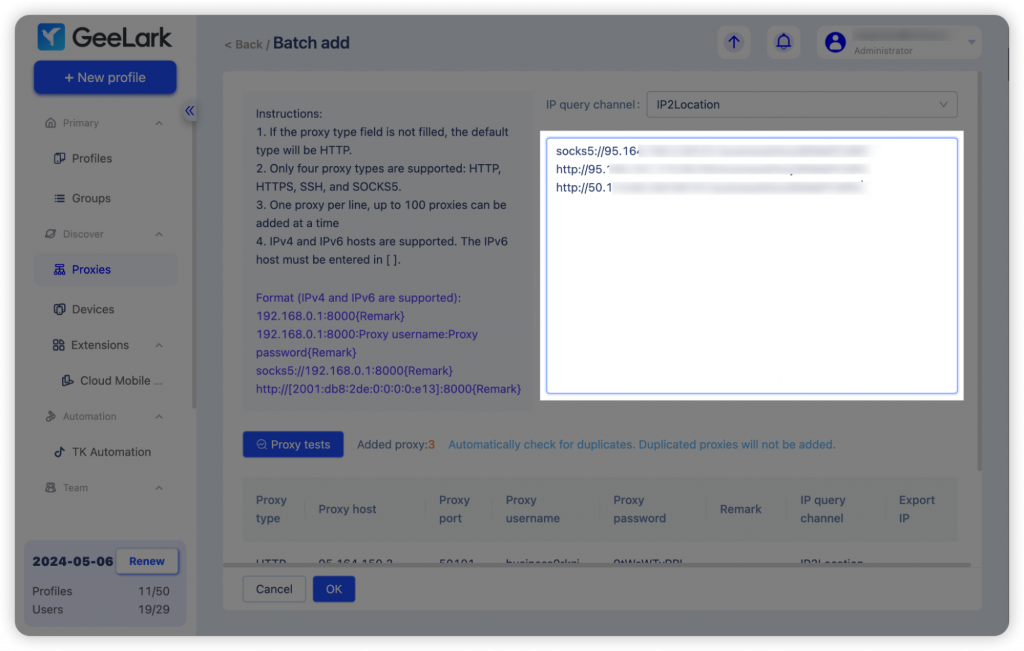
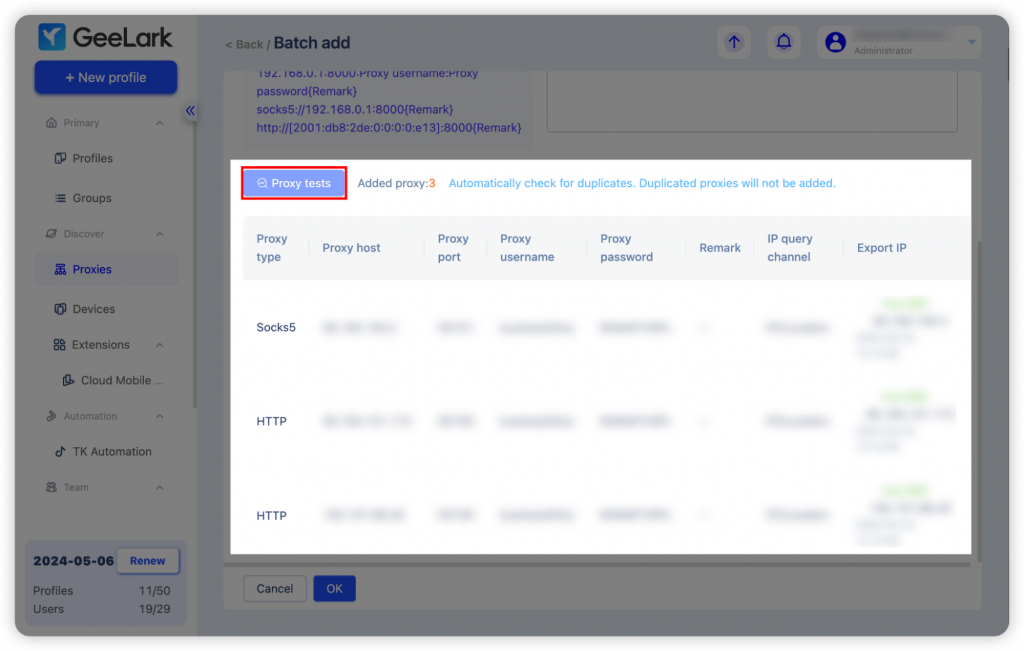
- Next, conduct a “Proxy test” to verify the IP connection and location. Confirm the additions by clicking “OK”.
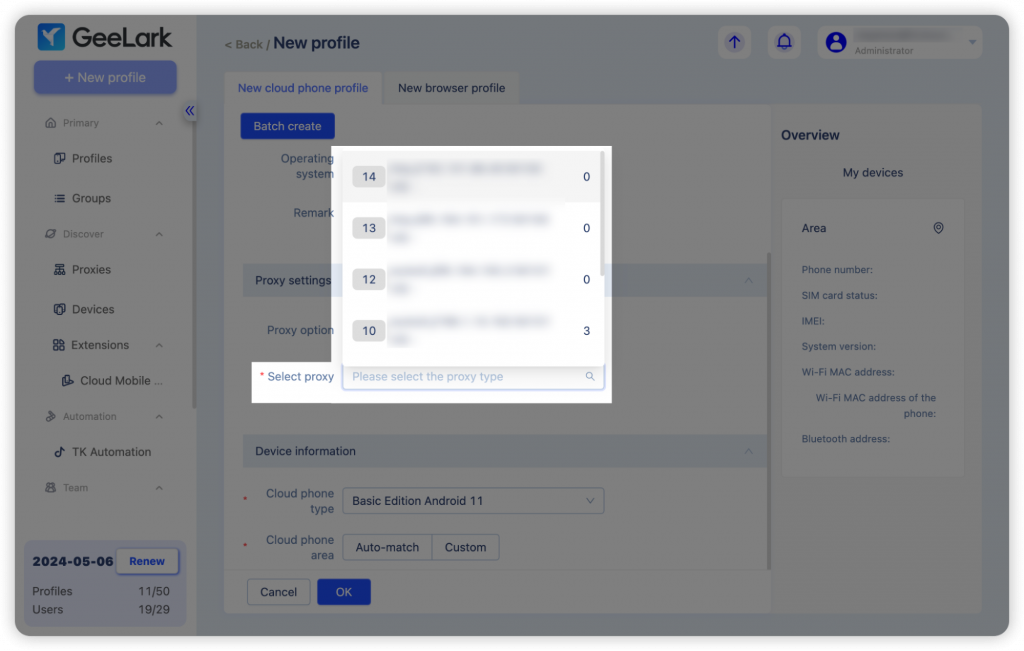
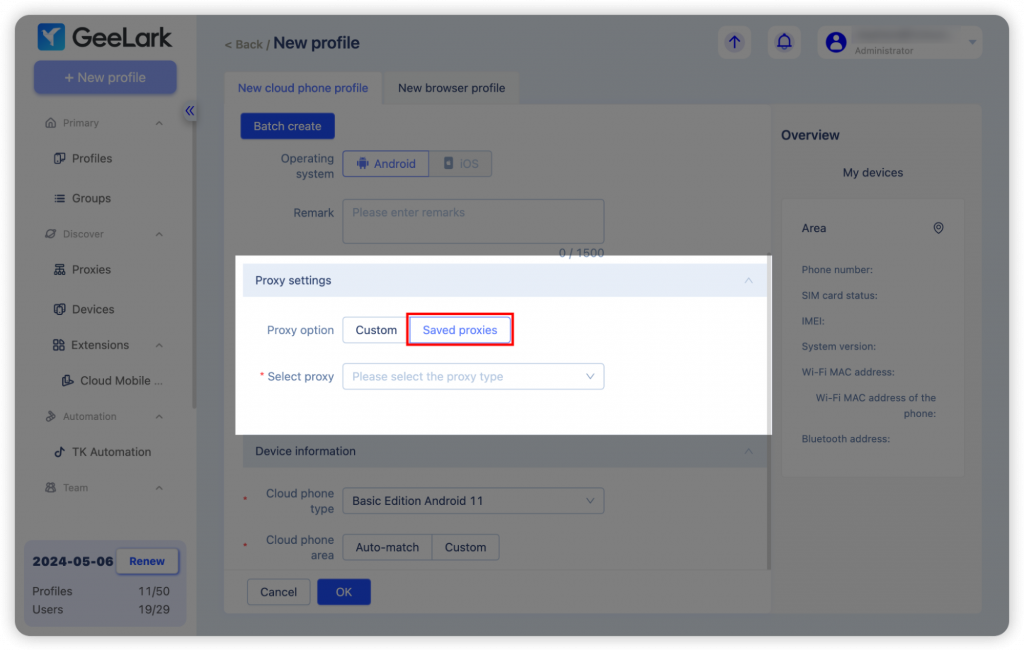
- The proxies you’ve added will appear in the “Saved proxies” dropdown list when you’re creating or editing a profile.
Each proxy is listed with two numbers: the left indicates its serial number in the Proxies section, and the right shows the number of profiles connected to it.