How to Auto Post Videos on TikTok, Reels& Shorts: Complete 2025 Guide
Trying to post one video to all your TikTok, Instagram Reels, and YouTube Shorts accounts? If you manage many accounts, you know it’s a huge task that can waste your entire day.
It’s slow, it’s boring, and it wastes time you could use to be creative and make great new content. This old way of working stops you from growing your audience as fast as you can.
But there’s a much better way to work. It’s called video post automation, and it lets you post to all your accounts at once, from one single place.
In this guide, we’ll show you exactly how to do it, step-by-step. No complicated tech talk, just a simple plan to help you save time and get more views. Let’s make your life easier.
What Are Your Options Right Now?
So, how are people trying to solve this giant posting problem? Let’s look at the two most common methods and why they are dead ends.
Option 1: The “Phone Army”
This is the most basic, brute-force method. You buy a bunch of cheap, used phones and post your videos on them, one by one.
If you only have 5 or 6 accounts, maybe you can put up with the pain. But what happens when you want to scale up to 100 accounts? Or 1,000? Just thinking about that workload is enough to give you a headache.
And that’s not even the worst part. Accounts get banned—it’s just a fact of life. When that happens, you have to reset the phone, reinstall all the apps, log in, and set everything up again from scratch. It’s a complete nightmare.
Option 2: Regular Social Media Tools
Okay, so what about using standard social media tools like Buffer, Later, or Plann?
The problem is simple: these tools are designed for companies managing their single official brand account, or for big influencers. They were never built for someone like you who is running a massive army of accounts.
They can’t handle the scale you need. They’re the wrong tool for the job.
So you’re stuck. The old-school phone method is way too slow and expensive, and the “normal” tools just don’t work for you. It feels like there are no good options left.
So, what’s the move? Is there a better way to do this?
Yes, there is. And it’s going to change the way you work.
Account Safety and Management
So, what if you could get the real Android environment of a physical phone, but with the power and convenience of a top-tier management tool? What if you could work from anywhere, without needing a room full of hardware?
This is exactly what GeeLark does.
But hey, before you click away, let’s quickly talk about the technology that makes this all possible. It’s called a cloud phone.
What Exactly is a Cloud Phone?
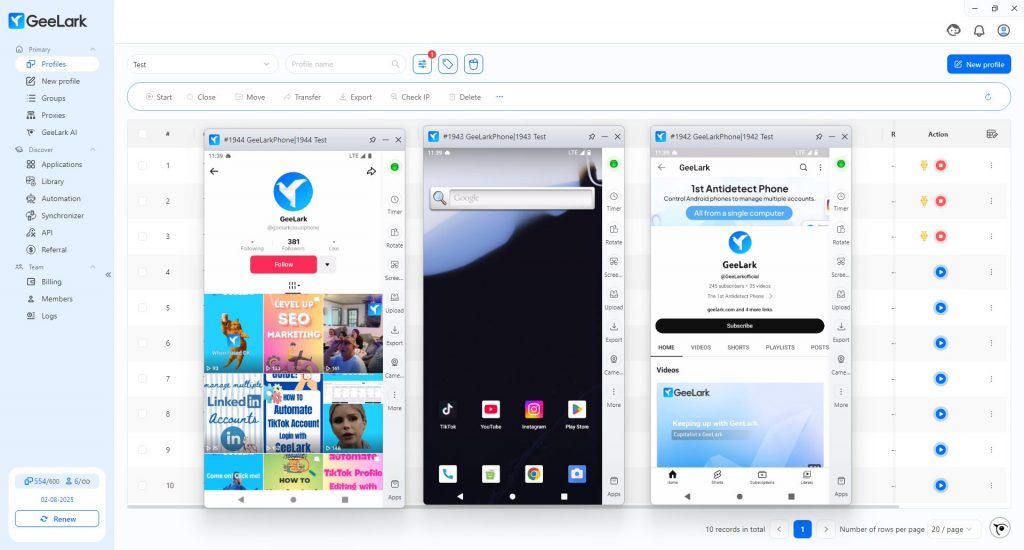
Think of a cloud phone as a brand-new Android phone that lives online. You control it from your computer, but it works just like a real phone in your hand. You can install apps, browse the Internet, and manage your accounts on a clean, fresh Android system.
Each cloud phone has its own unique device fingerprint, which means to platforms like TikTok and Instagram, it looks just like a regular person using their own personal phone.
And because you have many accounts, you’ll have network issues, right? GeeLark handles that, too. You can easily set up proxies for your cloud phones, even importing a large list of proxies and assigning them with just a few clicks. Problem solved.
An Easy Way to Manage Everything
GeeLark isn’t just about the cloud phone technology itself; it’s about making it incredibly easy for you to manage your entire operation. We built a user-friendly UI to solve the problems you hate the most:
Got an account banned? No sweat. Forget about the nightmare of resetting a physical phone. In GeeLark, you just click a button. In less than a minute, you get a brand-new cloud phone with a completely different device fingerprint, ready to go.

Tired of installing apps? Installing the same apps on ten, twenty, or fifty phones is a soul-crushing task. With our “Applications” feature, you just add the apps you need one time. The next time you open a cloud phone, GeeLark installs them for you automatically. You don’t have to lift a finger. Think of the hours you just saved. Time is money!
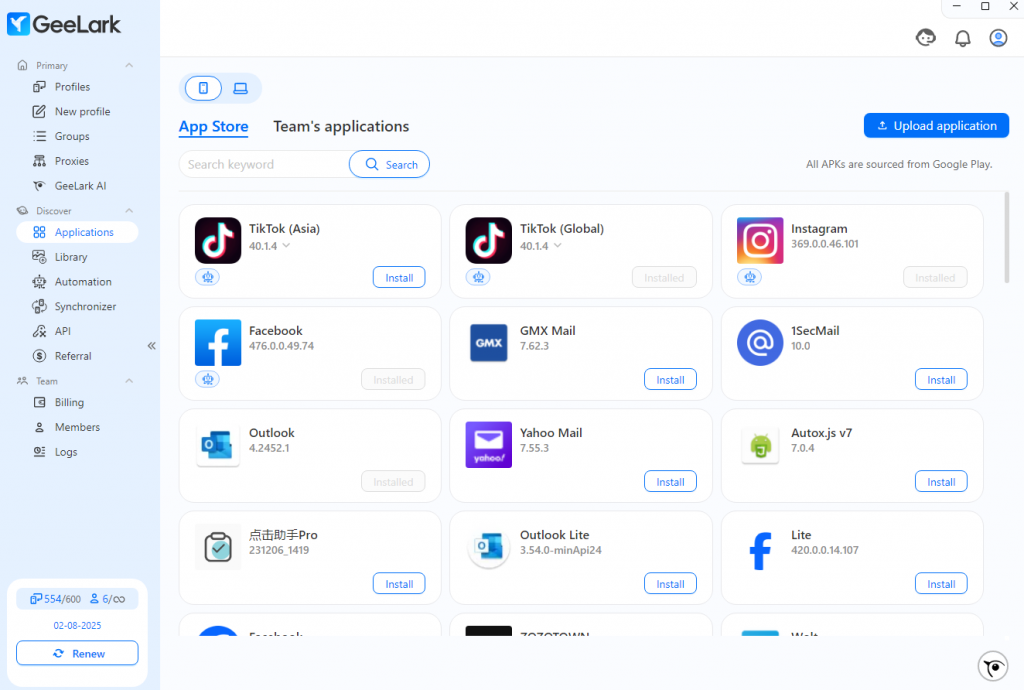
Need to stay organized? If you manage accounts for different clients or campaigns, things can get messy. That’s why basic features like Groups, Tags, and Notes are built right into GeeLark. You can easily organize your cloud phones and always know exactly what’s what.

Your Step-by-Step Guide to Automated Posting
Step 1: Sign Up and Install GeeLark
First things first, you need to get GeeLark on your computer.
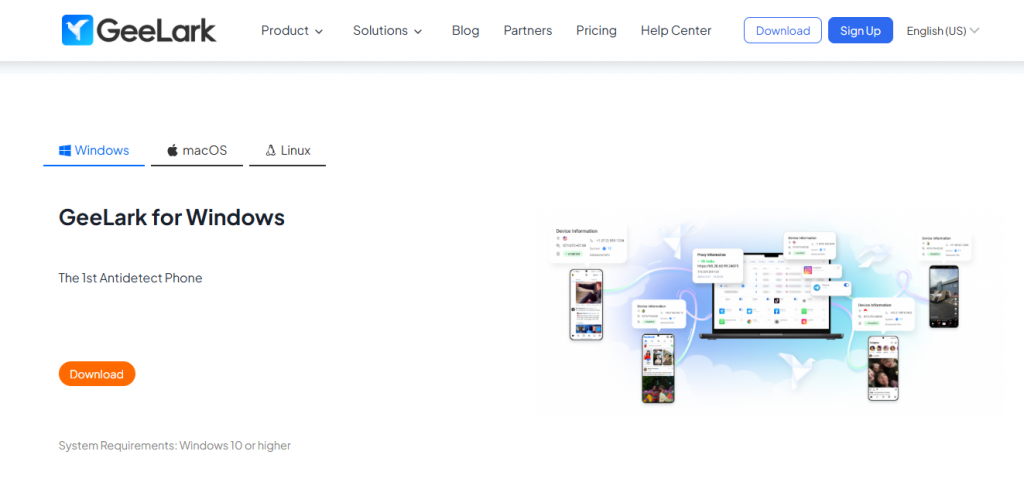
- Go to the GeeLark website and create your account. It only takes a minute.
- Download and install the GeeLark application. Just follow the simple on-screen instructions.
Once it’s installed, log in with your new account details. You’re now inside your command center.
Step 2: Create Your First Cloud Phone Profile
Remember those cloud phones we talked about? Let’s create one. This will be the new, secure “phone” where one of your social accounts will live.
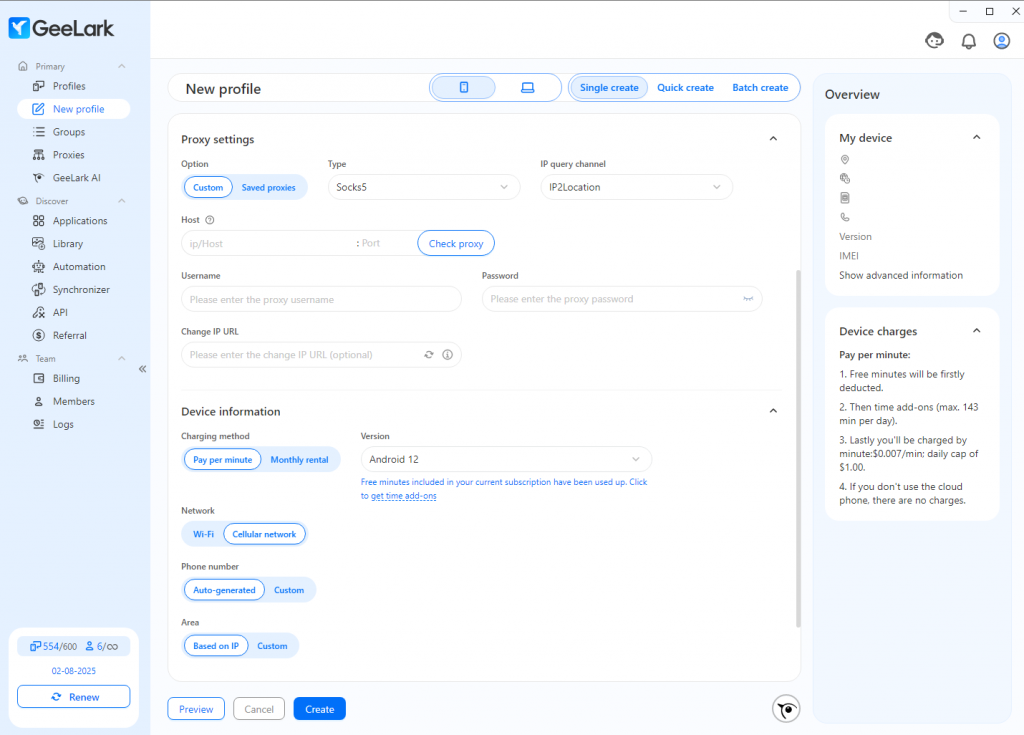
- In the GeeLark dashboard, find the “New profile” and click it.
- Give your profile a name, like “TikTok Account 1”.
- Set its Internet connection. This is where you add your proxy to give the cloud phone its own unique IP address, which makes it look like it’s in a specific city or country.
- Choose its system. You can pick the Android version.
- Click “Create”. That’s it! You’ve just created a fresh, secure cloud phone. Repeat this for as many accounts as you need.
Step 3: Use the Automation Template
Now for the magic. It’s time to tell GeeLark to post your video for you.
- Find the “Marketplace” in the dashboard.
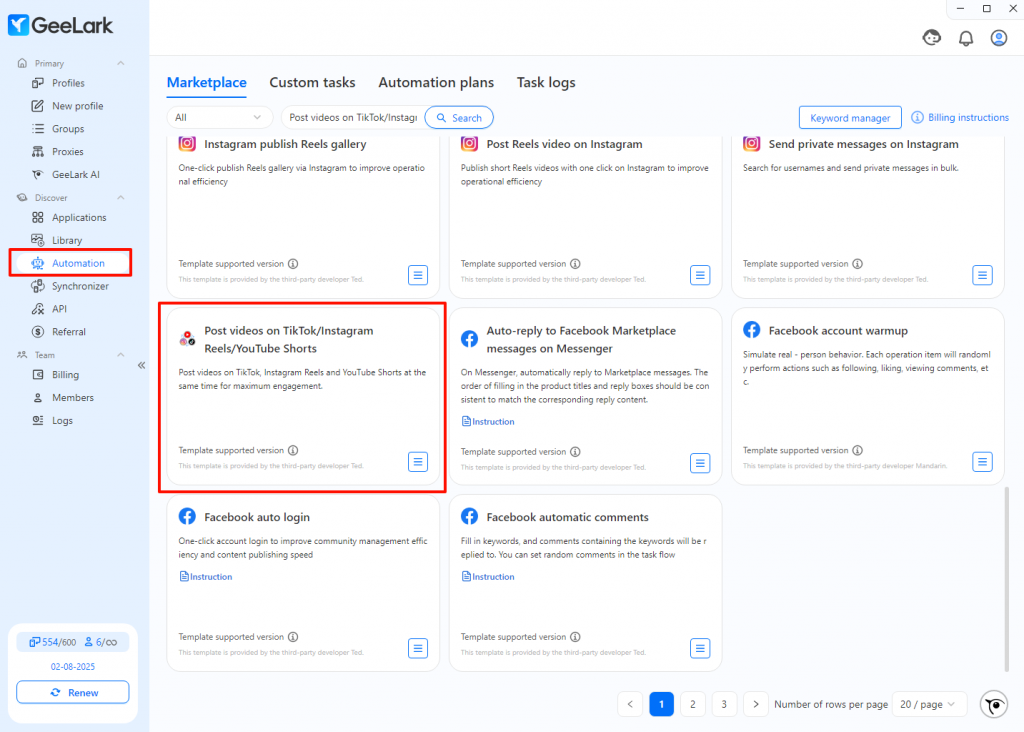
- Look for the template named “Post Videos on TikTok/Instagram Reels/YouTube Shorts“.

- Click to open the template. It will ask you for a few simple things:
- Which accounts to post to? Select the cloud phone profiles you want to use. You can select one, or you can select hundreds.
- When to post? This is the best part. You can choose to post it right now, or you can schedule it to go live at the perfect time, like tomorrow at 8 PM, when your audience is most active.
- What title to use? Write the text you want to go with your video.
- Which video to post? You’ll upload your video file here.
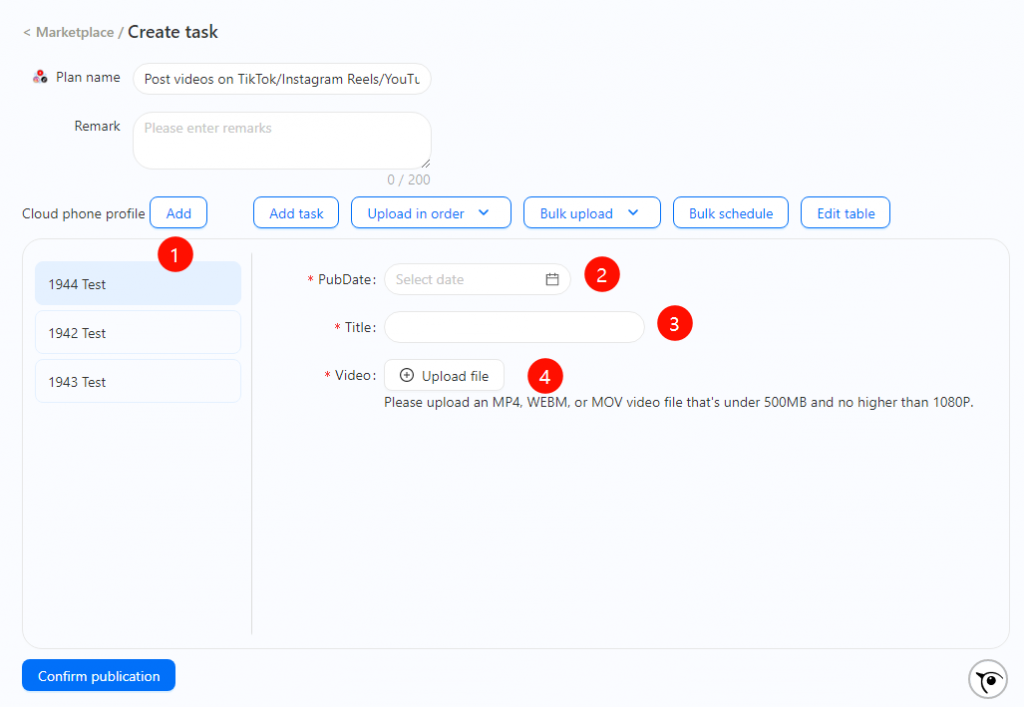
- Click “Confirm publication”
And you’re done. Seriously. GeeLark now takes over and begins posting your video to all the accounts you selected. You can go grab that coffee now.
Step 4: Check the Reports
Want to make sure everything worked? GeeLark keeps track of everything for you.
Go to the “Task logs”, you will see a clear, simple report showing you which posts were successful and which ones (if any) had issues.
You have a complete overview of your entire operation, all in one place. No more guessing, no more checking phones manually. Just clean, simple data.
It’s Time to Work Smarter, Not Harder
So, let’s keep it simple.
You can keep wasting your time doing the slow, boring work of posting videos all day. Or, you can use a smart tool that does it all for you.
GeeLark helps you auto post your videos to all your TikTok, Instagram and YouTube accounts from one single place. This way, you can finally stop worrying about the repetitive tasks and focus on what’s important: creating great content.
Ready to make your life easier? Give GeeLark a try.


