How to Auto-Post on X/Twitter: A New Solution for Account Farming
If you want to master Twitter account farming, you first need to master how to auto-post on Twitter. This isn’t about scheduling a few tweets; it’s about building an automated engine to scale Twitter accounts at a level that manual phone farming can never achieve.
This guide is your roadmap to that engine. Forget the risks and wasted hours of managing accounts by hand. I’ll show you how to set up a Twitter automation strategy for effective mass posting. This will help you build and manage your network easily and without any limits.
A Look Inside Today’s Two Main Farming Stacks
In the world of Twitter account farming, many successful users rely on one of two popular methods. Both are effective and have their own advantages. The goal here is not to criticize these methods, but to clearly explain the important factors and challenges you may face, especially as your operation grows. Knowing these points can help you decide which method is best for your long-term goals.
Anti-Detect Browser & Scripts
Using an antidetect browser with quality proxies is a common practice in the industry for good reasons. It allows users to operate in a desktop browser environment, which works well with established automation tools. One important factor for users of this method is the type of digital footprint it leaves behind.
In today’s mobile-focused world, a large part of user activity comes from smartphones. Because some users notice that their accounts are only active from a desktop, even if well-hidden, they may feel the results are not as good as expected. This realization often leads them to seek out genuine mobile-native solutions.
The Physical Phone Farm
To create a genuine mobile footprint, many operators use a physical phone farm. This approach effectively solves the desktop problem, but it introduces a new set of challenges related to managing physical hardware.
- Time-Consuming Manual Setup: For each new account, the setup process is repetitive: you must wipe the phone, reinstall the app, and configure settings. This is manageable for a few devices, but it becomes a major time investment as you scale Twitter accounts into the hundreds.
- Complex Content Management: Handling mass posting across a large fleet of phones is a logistical challenge. You need a reliable system to ensure the right content is sent to the right device without errors.
- Difficult Network Configuration: If you target different geographic regions, you need to configure a VPN or proxy on each individual phone. The time required for this task grows with every new device you add.
- High Operational Costs: A phone farm that runs all day and night uses a lot of electricity for power and cooling. You also need to consider the cost of replacing hardware that will eventually break down.
The Universal Challenge: Achieving 24/7 Automation
No matter which method you choose, the main goal for any serious operation is to achieve reliable, 24/7 Twitter automation. This is a common challenge for everyone involved.
This presents a practical challenge: you need to post content at the best times for accounts in different time zones. For those who aren’t programmers, creating custom scripts to manage this can be difficult, and hiring a developer can be costly.
Additionally, keeping your phone farm or phone box running all the time leads to ongoing electricity expenses and the need to constantly monitor the system to ensure everything is working properly. These are practical factors to consider when planning for a fully automated, 24/7 system.
The New Solution: GeeLark Cloud Phone
So, we’ve talked about the two choices you have: dealing with the risks of desktop automation or the high costs of a physical phone farm. GeeLark gives you a third option that takes the best parts of both methods.
The main thing GeeLark does is solve that huge mobile footprint problem. It gives you access to real cloud phones. Each “Cloud Phone” is its own separate unit, completely isolated from the others, with a unique digital fingerprint.
It’s not an emulator; it’s a real phone environment you control remotely. When you use GeeLark, all your actions look like they’re coming from a real mobile device, which gives your accounts the highest level of trust and safety.
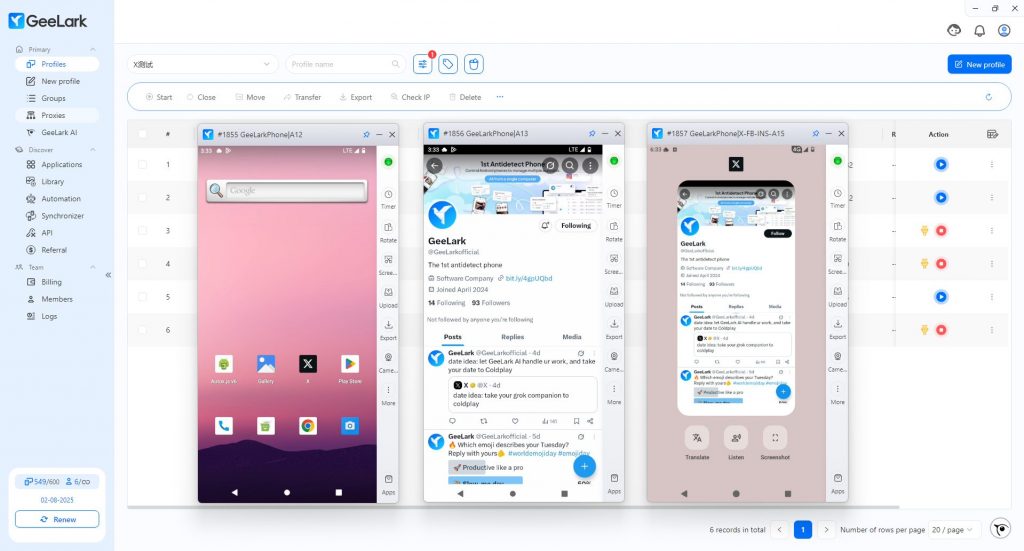
This also means you don’t need any physical hardware. You don’t have to buy any devices, manage any racks, or pay for high electricity bills. You can scale Twitter accounts instantly. If you need to go from 100 to 500 accounts, you just do it in the dashboard. It’s a simple change, not a huge project to buy and set up new hardware.

Finally, let’s talk about the part you’re probably most interested in: automation. GeeLark offers a perfect solution here. Worried you don’t know how to code? Don’t be!
GeeLark’s built-in “Marketplace” provides automation templates for all the major social media platforms. You can think of these templates as pre-built automation scripts that run on your cloud phones. You’ll find templates for things like warming up TikTok accounts, posting to Facebook, or uploading YouTube videos. And of course, that includes the one we’re focused on today: posting content on X.
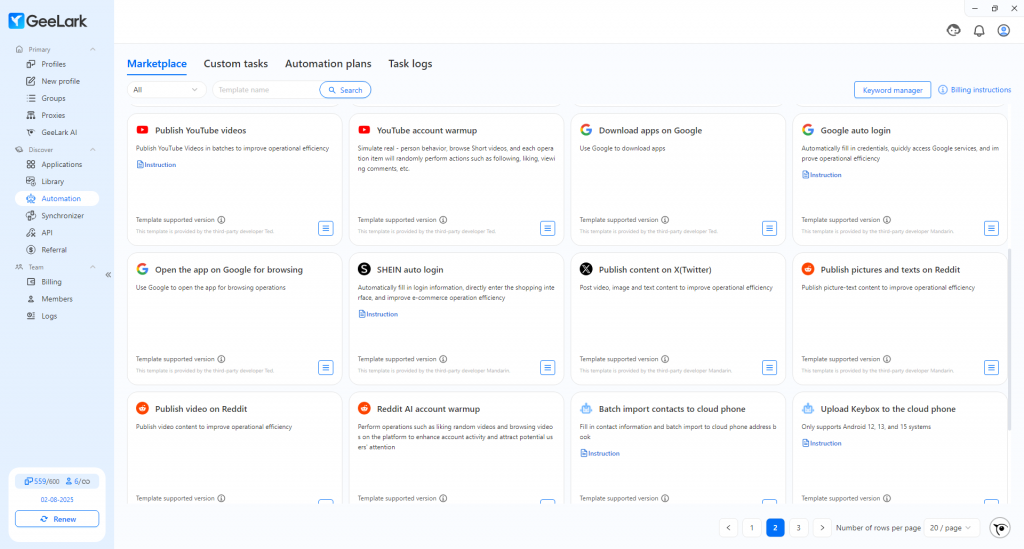
But here’s the best part. The most powerful feature of GeeLark is that it can run your automation tasks 24/7. When a task is running, you don’t need to be sitting in front of your computer. You don’t need to have the GeeLark app open. You don’t even need your computer to be on. The cloud phones will quietly get to work, executing the tasks you assigned at the scheduled times. You can go handle other business and just check the results the next day.
It requires zero technical skill, saves electricity, doesn’t take up your space, and frees up your time. That’s what GeeLark’s automation gives you. With that said, let me walk you through exactly how I use GeeLark’s automation to publish content.
Building Your Automated Account Farming Machine
Step 1: Get Your GeeLark Account
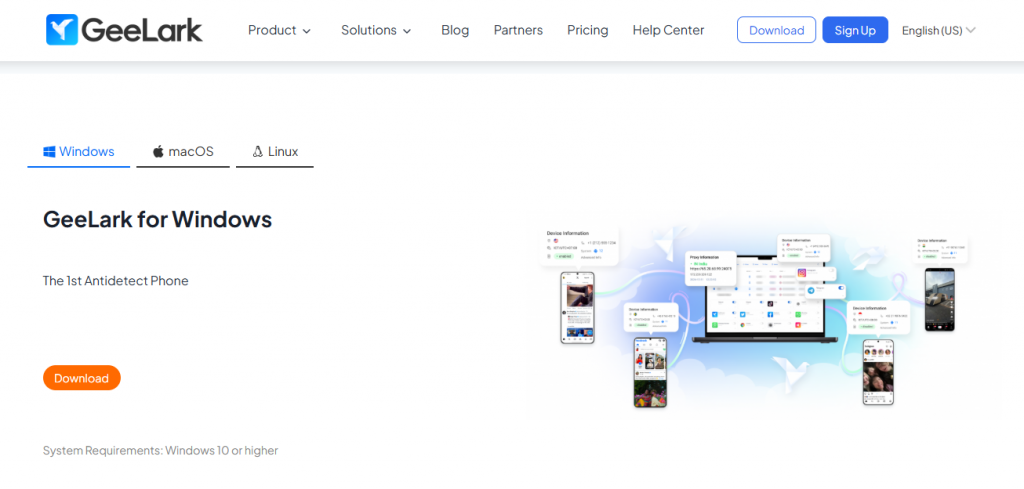
First things first, you need an GeeLark account. Just head over to the GeeLark website and sign up. After registering, download and install GeeLark. It is fully compatible with Windows, macOS, and Linux.
Step 2: Create Your Cloud Phone Profile
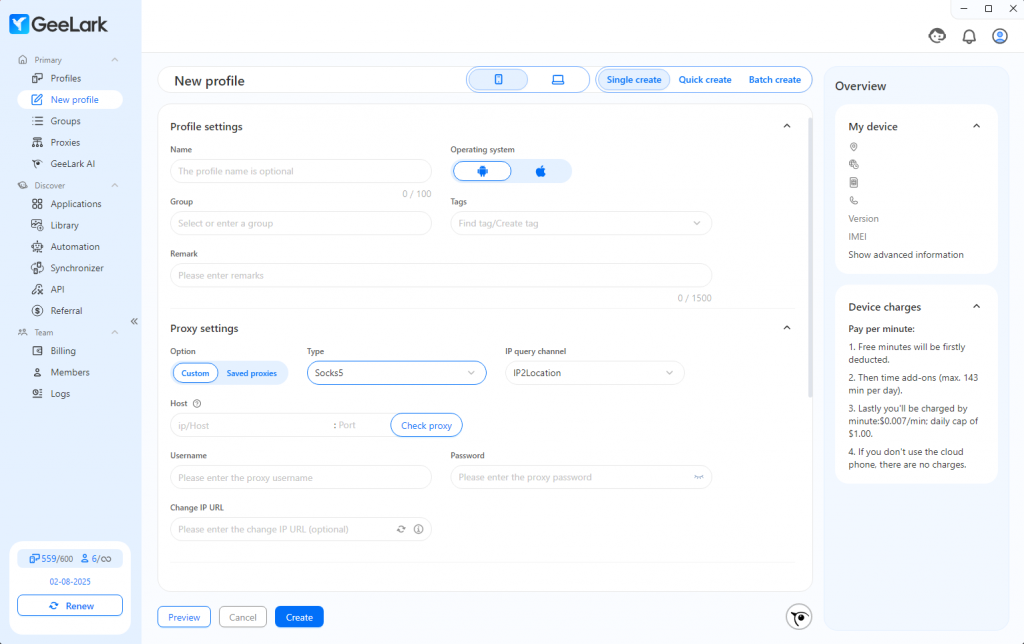
Before you can do anything else, you need a “phone”. In GeeLark, this is called a Profile. Think of each profile as a brand-new, unique smartphone that exists in the cloud.
- Find the “New profile” in your GeeLark dashboard and click it.
- Give it a name: Call it something you’ll remember, like “Twitter-US-Account-01.”
- Configure the network: This is the most important part. Here you decide where your “phone’s” internet connection comes from. You’ll see options to assign a proxy. This is how you control the phone’s IP address and location. If you want the account to appear to be in Germany, you use a German proxy.
- Save the profile.
That’s it. You now have a unique cloud phone, with its own fingerprint and network settings, ready to go.
Step 3: Find the Right Template in the Marketplace
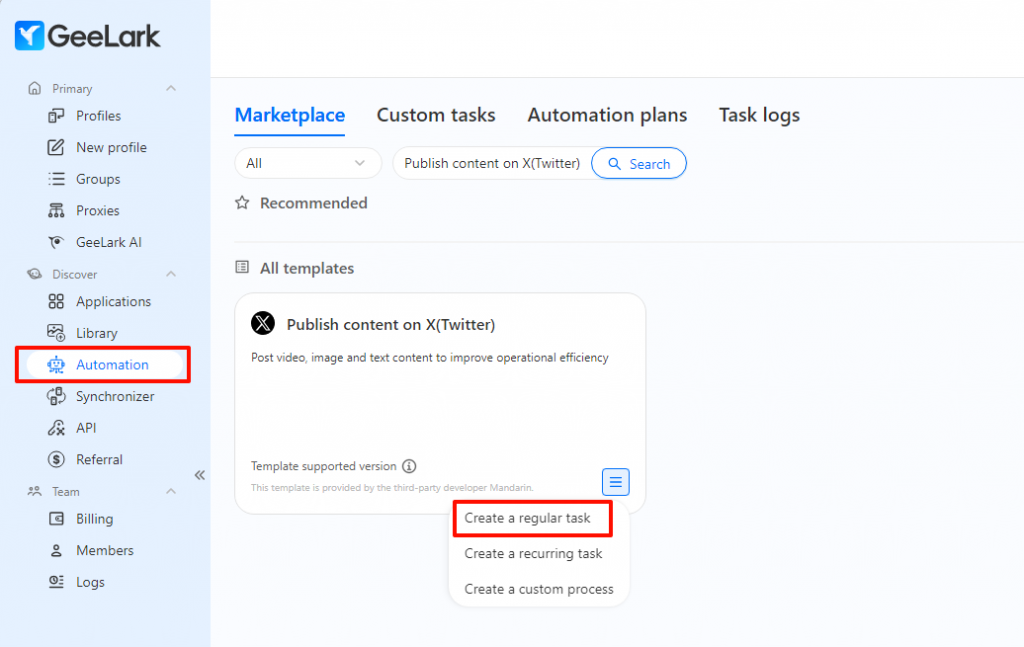
Now that you have a phone, let’s give it a job to do. Head over to the “Automation”. This is your command center for all things automation.
- In the Marketplace search bar, type in “Publish content on X(Twitter)”.
- You’ll see the template pop up. Click the option button, and then click “Create a regular task”.
This action loads the pre-built automation script into your workspace.
Step 4: Configure the Task and Run the Automation
This is where you tell the template what you want it to do. The interface is designed to be very simple.
- Select Your Cloud Phone: The first thing you’ll do is choose which Profile (the cloud phone we created in Step 1) you want to run this task on.
- Set the Schedule: You can choose to post it immediately or schedule it for a later date and time.
- Add Your Content: You’ll see fields for your post. Type the text you want to post.
- Upload Video or Image
Once everything is configured, just hit “Confirm publication“

Step 5: Check the Report
Here’s the cool part: the task is now sent to one of your cloud phones to be executed. You can close the GeeLark app, shut down your computer, and go do something else.
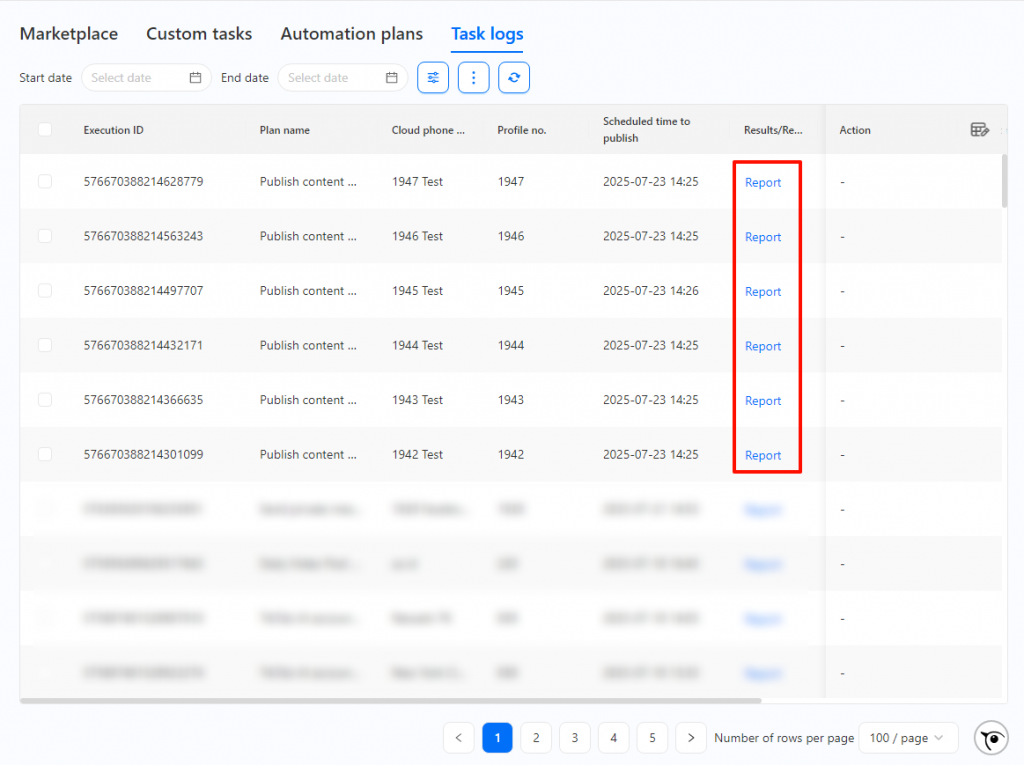
After the task has run, you can check its status in the “Task logs”. You’ll see a clear log showing which account it posted to, what content was published, and whether it was successful. It gives you a complete overview of everything your automated system is doing for you.
And that’s it. You’ve just set up a professional-grade, cloud-based Twitter automation task in a few minutes, without writing a single line of code. Now, imagine doing this for hundreds of accounts. That’s the power of this system.
Wrap it up
So, what’s your decision? Your operational choice comes down to this: you can either manage a ecosystem of separate tools, like an antidetect browser, proxies, and scripts, or you can invest in the high overhead and physical limitations of a phone farm.
However, there’s a better option. Enter a unified platform designed to handle both challenges. GeeLark provides a cutting-edge cloud phone for a true Android environment. GeeLark also includes a powerful antidetect browser built right in. You get both premier strategies in one place!
Interested in how an all-in-one antidetect platform can help grow your business? Try GeeLark today!


