How to Buy Proxies: The Complete Beginner’s Guide
If you’ve only used VPNs before, learning how to buy proxies can feel confusing at first. Terms like residential, datacenter, or rotating proxies might sound technical, but once you understand the basics, choosing the right one becomes simple.
This complete beginner’s guide will show you how to buy proxies safely and effectively. You’ll learn what proxies are, how different types work, how pricing models affect your cost, and how to use them with antidetect browser and cloud phone.
By the end, you’ll know exactly how to test, compare, and choose the best proxies for your goals and budget.
What is Proxy & How it Works?
What Is a Proxy Server?
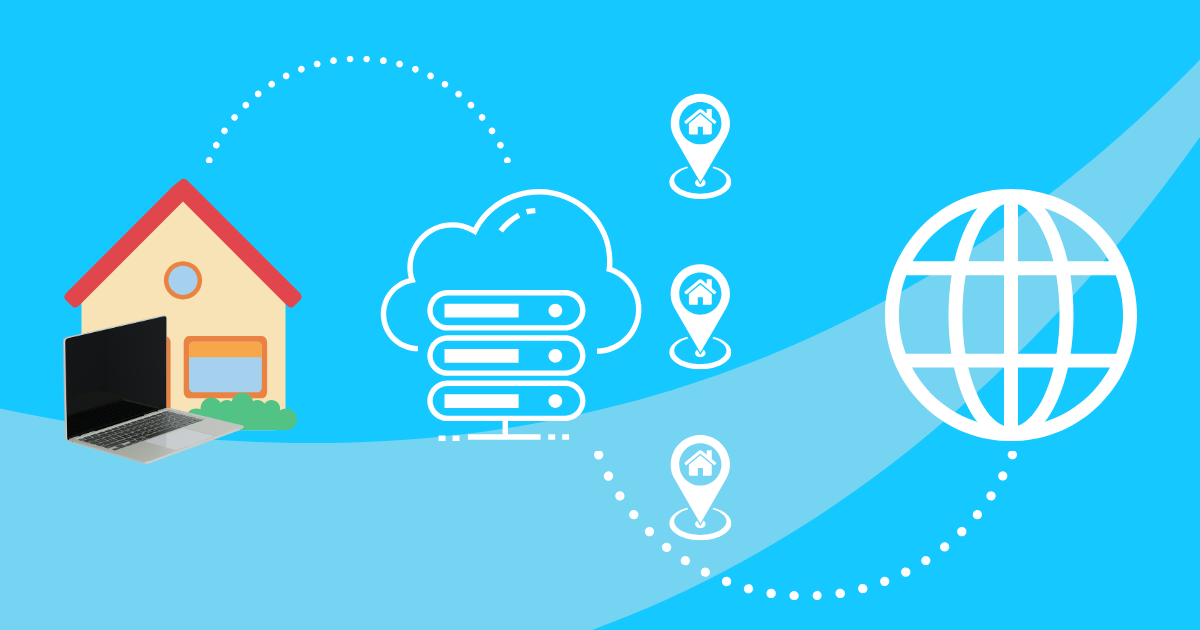
A proxy server is a computer that sits between your device and the internet. When you use a proxy, your web traffic doesn’t go directly to the website you visit. Instead, it goes through the proxy first. The proxy then sends your request to the website, gets the data, and passes it back to you. This process hides your real IP address and replaces it with the proxy’s IP.
Because of this, websites see the proxy’s information instead of yours. It’s a simple way to protect your privacy, control internet access, or appear as if you’re browsing from a different location.

Why You Need Proxies for Multi-Account Management
When you manage many accounts, separating devices or browser profiles is not enough. You also need network isolation. Each account should have its own IP address so platforms cannot connect them through the same network.
That is why most people use proxies. A proxy gives every account a different IP, even if one IP is used for only one or two accounts. This makes it harder for platforms to link them together.
Antidetect browser and antidetect phone work perfectly with proxies. They create unique browser profiles or Android devices, while proxies handle the network part. This setup makes every account look real and independent.
VPNs are not ideal for managing many accounts. They change the IP for the whole device, which makes it hard to control each account separately. Switching VPN servers often is also slow and messy. Proxies are much easier to manage, more flexible, and better for teamwork.

Proxy Types You Need to Know Before Buying
Have you ever opened a proxy service website and felt confused by all the options? Terms like residential, datacenter, static, rotating, or SOCKS5 can be hard to understand at first.
Before you buy any proxy plan, it helps to know what these words mean and how each type works. Choosing the right kind of proxy can save you money, improve speed, and reduce the risk of account bans.
Let’s get started.
By IP Source
Proxies can be classified by where their IP addresses come from. The source affects how real, stable, and safe your connection looks to websites.
| Proxy Type | IPSource | Key Features | Best Use Cases |
| Residential Proxy | From real home internet connections (ISPs) | Looks like normal household traffic;Very reliable for avoiding detection | Social media, ad verification, e-commerce |
| Datacenter Proxy | From cloud or hosting providers (AWS, Google Cloud, etc.) | Not linked to real users or ISPs; High speed and low cost | Web scraping, automation, quick tasks |
| ISP Proxy | ISP-registered but hosted in datacenters | Appear like real household connectionsReliable and steady performance | Long-term projects, business use |
| Mobile Proxy | From real mobile networks (3G, 4G, 5G) | Most authentic IPs, shared with real users | Social media accounts |
By Protocol
Proxies can use different connection protocols such as HTTP, HTTPS, and SOCKS5. These terms describe how data moves between your device and the website or app you visit.
For most users, especially those using antidetect browsers or antidetect phones, the protocol type does not make a big difference. Whether it is HTTP, HTTPS, or SOCKS5, all can handle normal web browsing and app use without issues.
In short, HTTP and HTTPS are made for websites, while SOCKS5 works for almost any type of internet traffic. Unless you have very specific needs, any of them will work fine for multi-account management and daily tasks.
By Ownership/Sharing
Proxies can also be categorized by how many people share the same proxy server:
- Shared proxies are used by several people at the same time, often between three and ten users. Because many people share the same IP, performance can change depending on how others use it. If another user does something suspicious, that IP might get flagged or blocked, which affects everyone using it.
- Private proxies (sometimes called semi-dedicated) are shared with only a few users, usually two or three. They offer better speed and reliability than shared proxies, while still being cheaper than fully dedicated ones. This type works well for managing small groups of accounts.
- Dedicated proxies (also known as exclusive proxies) belong to one user only. You have full control over the IP, and no one else can use it. Because it is not shared, speed and reliability stay consistent. The downside is that this type costs more, but it’s the safest and most stable option.
By IP Rotation
Proxies can also be divided by how their IP addresses change over time:
- Static proxies keep the same IP address for your entire session or subscription period. Once an IP is assigned to you, it stays the same for all your requests until you change it manually or it gets blocked. This makes static proxies great for tasks that need a stable connection or consistent identity, such as logging in to the same account repeatedly.
- Rotating proxies (also called dynamic proxies) automatically switch IP addresses at set intervals. The rotation can happen after each request, every few minutes, or whenever a new session begins. You connect to one proxy gateway, and the provider handles the rotation for you. This helps you avoid detection and reduces the risk of bans during large-scale automation or scraping.
You will often see these rotation types combined with IP sources. For example, static residential proxy means a fixed residential IP, while rotating residential proxy changes automatically. The same applies to datacenter proxies. The idea is simple: static proxies keep one IP, while rotating proxies automatically change it for you.
Understanding Proxy Pricing Models
When buying proxies, you will see several pricing models. Understanding how each one works helps you plan your budget and choose the best option for your needs.
Pay-Per-GB (Bandwidth-Based)
You pay based on the amount of data you use. The more traffic you send, the more you pay. This model is common for rotating residential and mobile proxies. Typical prices range from $1 to $8 per GB, depending on the proxy type and volume. This option is great if your usage changes from month to month because you pay only for what you use. However, costs can rise quickly if your data usage spikes.
Pay-Per-IP (IP-Based)
You pay a fixed fee for each IP address, usually billed monthly or yearly. This structure is common for static and datacenter proxies, costing about $0.50 to $5 per IP per month. It’s easy to predict your expenses with this model, but you pay for all the IPs even if you don’t use them heavily.
Pay-As-You-Go
This model lets you buy proxies only when you need them. You don’t need a subscription or long-term contract, but prices are usually 15–30% higher than regular plans. It’s perfect for testing a new provider or short-term projects, though not ideal for large-scale or ongoing use.
Subscription Plans
Many providers offer monthly or annual plans with volume discounts. The more you commit, the cheaper each unit becomes. For example, a small monthly plan might cost $80 for 10GB, while a larger one could offer $700 for 100GB. Annual plans often include 10–30% discounts, making them a good choice for long-term users who want predictable pricing.
Preparing to Buy Proxies
If you are new to proxies, it is normal to feel unsure about what type to buy. You might see datacenter, residential, or mobile proxies, and not know which one will actually work best for your platform. The truth is, there is no single answer. What matters most is testing.
Start Small and Test
Datacenter proxies are fast and affordable, but some platforms can detect them, which may lead to account bans. Residential proxies, on the other hand, cost more but appear as real home connections, making them much harder to flag.
That’s why it’s best to start small and test before buying in bulk. Testing helps you find what actually works for your setup and your budget. For example, some users choose to save money by connecting 5 or even 10 accounts to one IP. This increases the risk of bans, but it still fits their cost tolerance. Others take a safer approach, using one account per IP with rotating proxies to minimize detection.
Every business has its own balance between cost and safety. Through testing, you’ll learn how many IPs you need, how much bandwidth you use, and what level of spending gives you the best results.
Begin with a few proxies and try them in your real environment. Observe how stable the IPs are, how often they get blocked, and whether your accounts remain secure. Once you find the right combination of type and provider, you can scale with confidence.
Compare Different Providers
Before choosing a proxy provider, take time to compare prices, features, and limits. Many companies offer different rates for datacenter, residential, or mobile proxies, and the gap can be huge. If possible, create a simple table to track each provider’s pricing, data limits, maximum discounts, and usage restrictions. This helps you plan your budget more accurately and avoid surprises later.
Price alone does not tell the full story. The real quality of a proxy, including its stability, freshness, and reputation, can only be learned through testing. Every business and platform behaves differently. Some users find that datacenter proxies work well for their needs, while others see better results with residential IPs. There is no single answer, and no provider can guarantee perfect results.
After testing several providers, you will have a clearer idea of your real costs and what type of proxies fit your platform and budget best. What matters most is not which proxy is the most expensive, but which one keeps your accounts safe and your business profitable.
Using Proxies with Anti-Detect Browser and Anti-Detect Phone
After you buy proxies, you need to know how to add them to anti-detect browser and anti-detect phone. These tools are important for multi-account work. Each profile or cloud phone keeps its own fingerprint, device ID, cookies, and proxy. That makes each account look like a different real user.
Common Proxy Formats
Providers usually give proxy details in one of these formats:
- Format 1: Host, port, username, password
- Host: proxy.provider.com or IP address
- Port: 8080
- Username: user123
- Password: pass456
- Format 2: Single line
- user123:pass456@proxy.provider.com:8080
- Format 3: IP whitelist
- IP Address: 123.45.67.89
- Port: 8080
- (Your IP address is allowed to connect)
Most anti-detect tools accept these formats. Check which format your tool needs. The provider dashboard usually shows the correct format.
Create a Profile
Let’s take GeeLark as an example. GeeLark is a complete anti-detect solution that brings both anti-detect browser and anti-detect phone into one platform. It is the only all-in-one tool that allows you to manage accounts across desktop browsers and mobile apps in the same place.

Step 1: Create a New Device/Profile
In GeeLark, you can create either:
- Browser profiles (for web-based account management)
- Cloud phone profiles (for mobile app account management)

Click “New Profile” and select your profile type
- Give it a name (e.g., “TikTok Account 1” or “Instagram Account 2”)
- The system assigns it a unique device ID, IMEI, MAC address, fingerprint, etc.
- Each profile is completely isolated from others
Step 2: Configure the Proxy
- In “Proxy settings“, choose “Type”, such as SOCKS5 or HTTP.
- Enter your proxy details from your provider, then click “Check proxy” to test the connection.
- If everything is correct, GeeLark will confirm it’s working.

Step 3: Advanced settings
In this example, we will use the cloud phone profile as a guide. After connecting your proxy, you can adjust the advanced settings to control how your cloud phone looks and behaves.
- Choose a System Version: Select the Android version you want for your cloud phone, such as Android 15.
- Pick a Payment Plan: You can pay per minute or choose a monthly rental if you use the phone regularly.
- Select Network Type: After connecting your proxy, you can adjust the advanced settings to control how your virtual device looks and behaves.
- Customize Device Details: GeeLark lets you randomize or manually choose your phone number, device brand, and model. These options make each cloud phone unique, helping accounts look like they are operated by different real devices.
- Set Location and Language: Location can be set based on your proxy IP or customized manually. You can also pick your preferred language, such as English (United States).

Step4: Create and Start Your Profile After confirming all the settings, click “Create” to finish setup. Your new profile will appear on the “Profiles”. From there, click “Start” to launch the cloud phone or browser profile you just created.


